
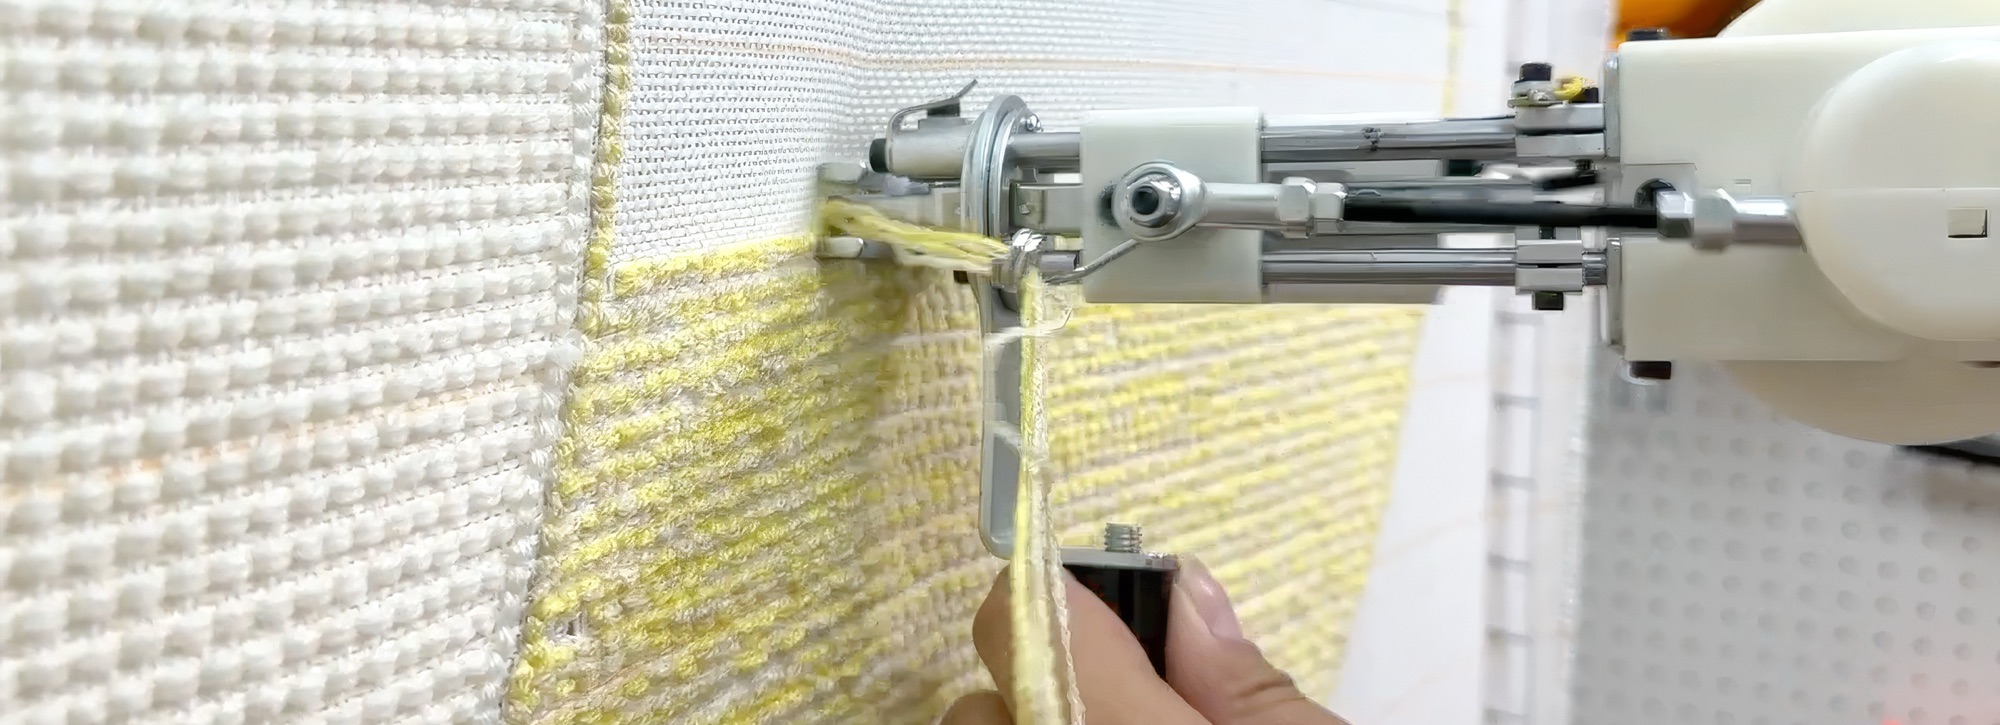
A rug is made in five steps: stretch the cloth, draw the design, tuft the yarn, glue and finish the back, and trim the surface. What makes the biggest difference to the result is stretching the cloth tight and tufting carefully along your design.
Tufting takes about 1–2 hours for a rug around the size of an A4 sheet, and 2–4 hours for a 40 × 40 cm rug. On top of that, you need to leave the glue to dry for about a day.
01 Stretch the cloth on the frame
Stretch the tufting cloth on the frame. Ideally, it should be tight enough to make a sound when you flick it lightly with your finger. You have to pull hard, and it is the most physically demanding part of the whole process, but it is also the step that matters most for how easily you can tuft.
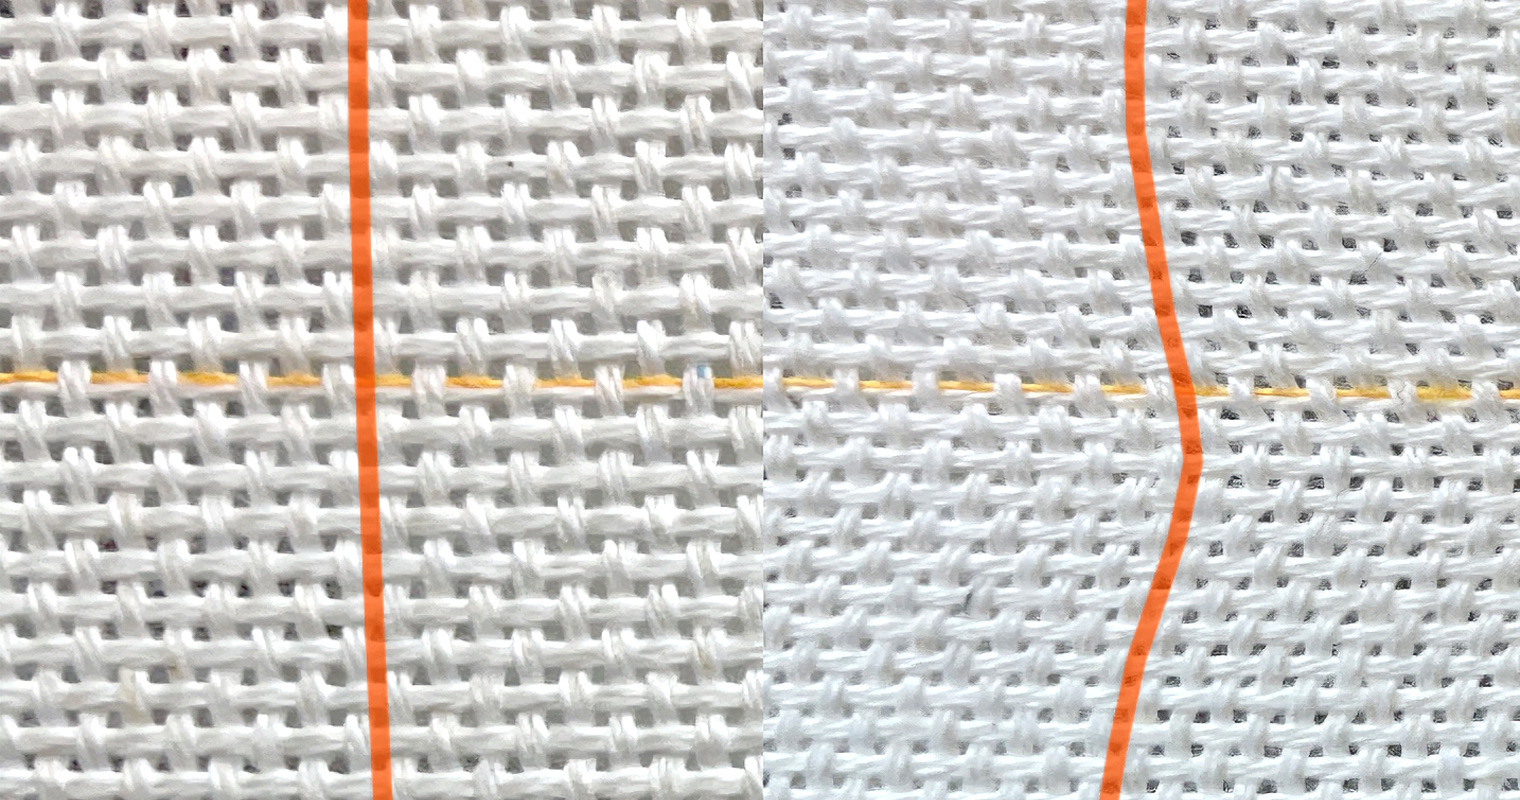
The other point is the weave. A tufting gun tends to follow the weave of the cloth, so if the weave is distorted or slanted, the gun won’t go where you want it to. Stretch the cloth so the weave runs as straight up and across as possible.
YOUTUBE Tips for building a tufting frame and stretching the cloth (in Japanese)02 Draw the design
Draw the design on the stretched cloth. You can project the image and trace it, or draw it freehand.
The one thing to watch out for most here: you tuft from the back of the rug, so draw the design mirrored. Almost everyone who tufts makes this mistake at least once.
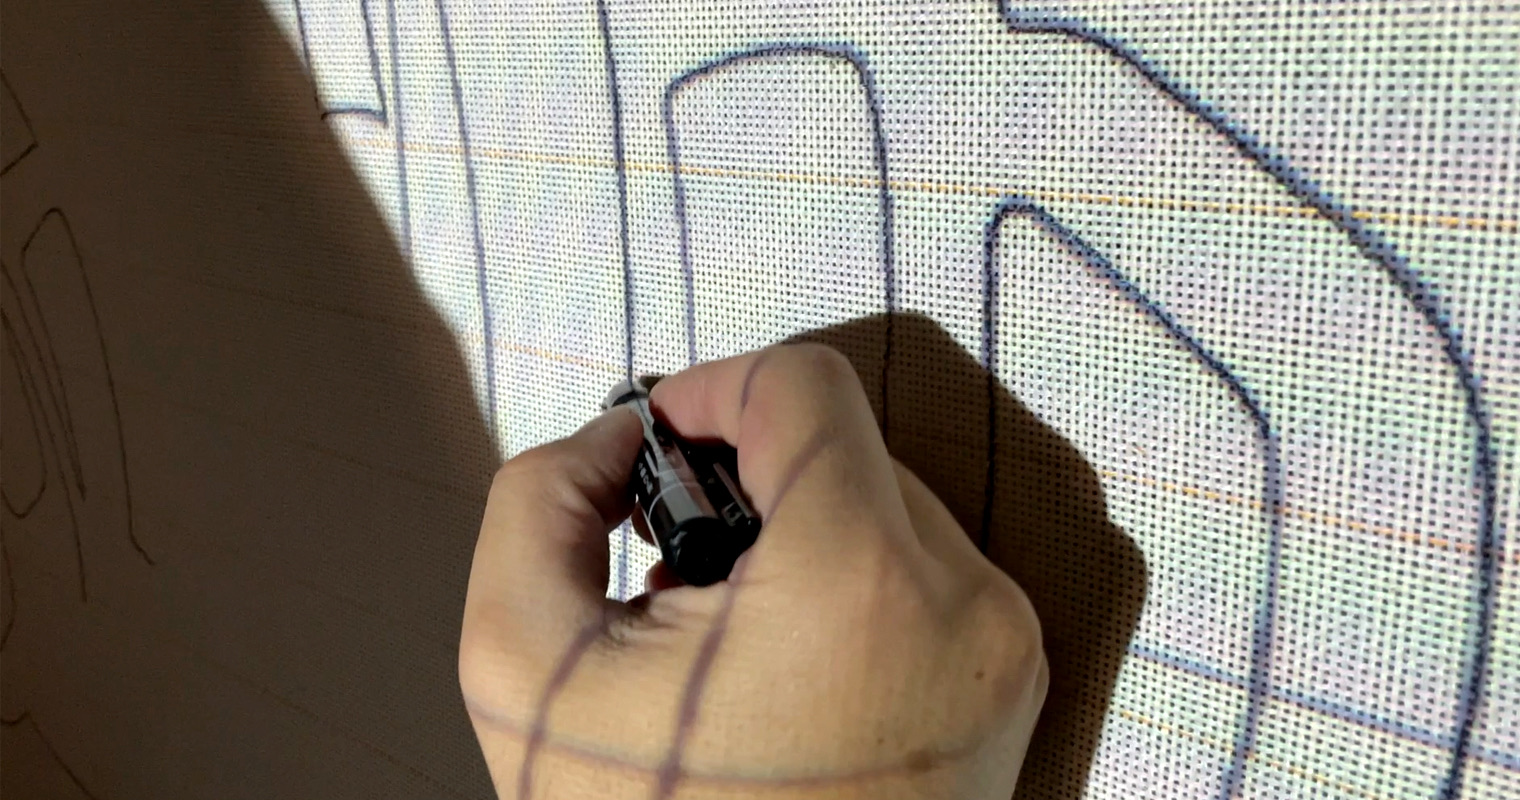
If you press down hard with the pen, the cloth shifts or gets distorted. The trick is to glide your hand and the pen over the cloth.
Draw triangle or square marks in the four corners. That way you can line everything up again if the projected image shifts, or if the work carries over to the next day.
03 Tuft the yarn
A tufting gun only moves in one direction. For diagonals and curves, you steer the angle of the gun with your dominant hand. The handle turns 360 degrees, so set it wherever it is easiest to push and hold.
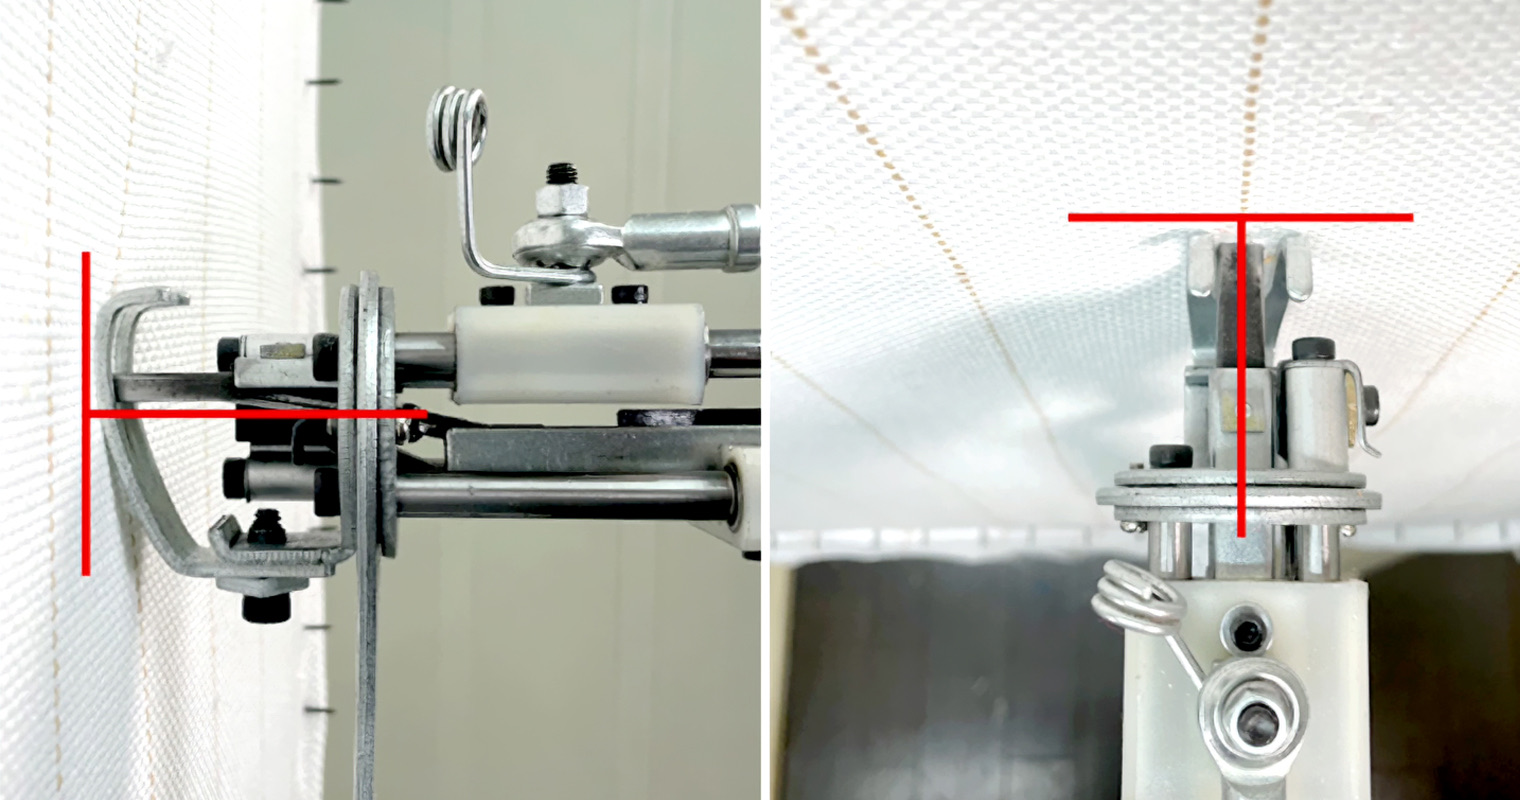
You will make fewer mistakes if you hold the gun at 90 degrees to the cloth. It is also important that the foot of the gun always stays flat against the cloth. Two things help with this: pressing the gun firmly against the cloth, and having the cloth stretched tight.
Tufting straight lines
Go vertically or horizontally, whichever is easier for you. If you stretched the cloth with the weave straight up and across in step 01, you can tuft neat lines here.
Tufting curves
Pivot the gun, changing the angle little by little, and pull the trigger in short, single bursts. Think of it as joining up short straight lines, and you’ll be less likely to stray from your design.
What order to tuft in
There are no rules, but we recommend tufting the outline of each color first, then filling in the inside with straight lines. This makes mistakes less likely when filling in, and makes trimming at the end a little easier.
04 Glue and finish the back
When you have finished tufting, spread glue over the back with a spatula to lock the yarn in place. Before you do, trim any stray yarn with clippers or scissors. Otherwise the spatula can catch it and pull yarn out, or leave the back bumpy.
Spread the glue gently and as evenly as possible, neither too thick nor too thin. If you press down as you spread, it seeps through to the front of the rug. Yarn will come loose wherever the glue is missing, so this unglamorous step makes a big difference to the result. Moving on before the glue is completely dry can also make yarn come loose. Allow about a day for it to dry.
There are three common ways to finish the back. There is no single right answer, so choose whatever suits you — you could even use a favorite fabric as the backing.
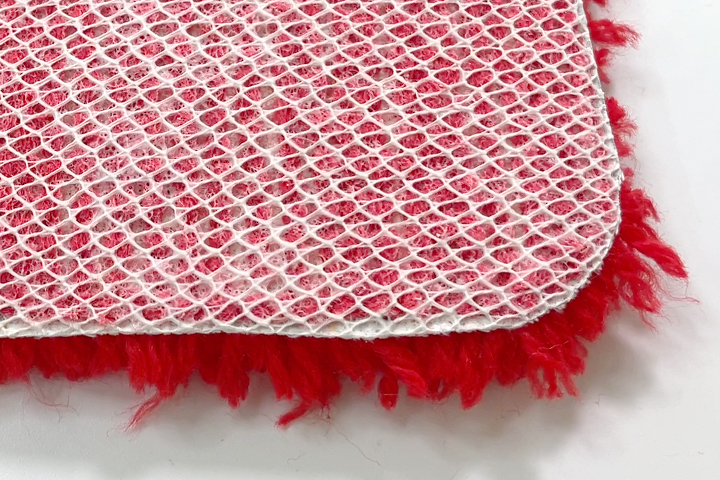
- Spread the glue
- Attach the mesh
- Leave to dry
- Cut off the excess mesh and the edges of the tufting cloth
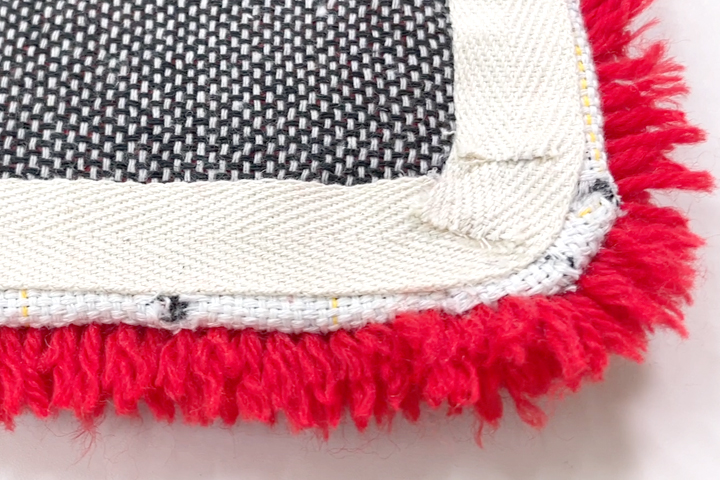
- Spread the glue
- Attach the backing cloth
- Leave to dry
- Fold back the excess edges of the tufting cloth and fix them with a glue gun
- Attach twill tape around the edge
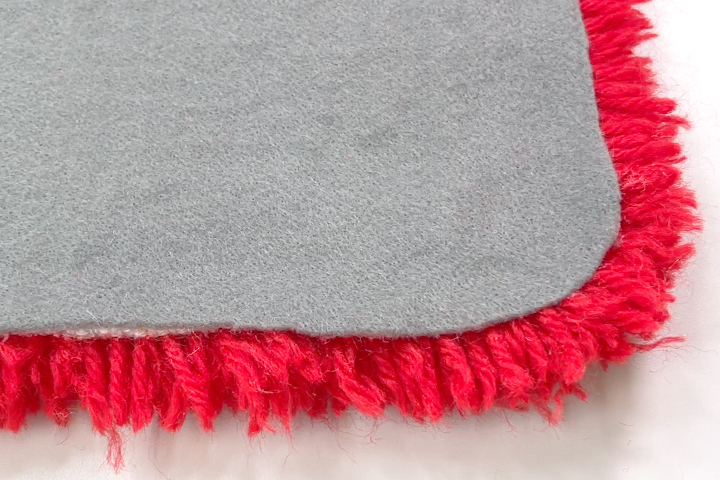
- Spread the glue
- Leave to dry
- Fold back the excess edges of the tufting cloth and fix them with a glue gun
- Attach the felt
- Cut off the excess felt
05 Trim the surface
Trimming the surface is optional. You do it when you want the colors and the edges between them to stand out clearly.
Shaving the surface with clippers or a similar tool smooths out the unevenness of the yarn and evens out the pile, so the edges between colors come out clean. If you cut too deep, you can’t undo it. Shaving lightly, several times over, is the safer approach.
Cutting along the edges between colors with scissors makes them stand out even more. You can also create different pile heights or round off the edges between colors.
Common problems
- The finished picture is mirrored
- The design wasn't drawn mirrored. You tuft from the back, so always mirror it in step 02.
- The cloth tore and there is a hole
- This happens when the cloth is not stretched tight enough, or the foot of the gun lifts off the cloth. A tear made while tufting is hard to repair, so be careful.
- You stray from the design
- You are taking curves in one go. Change the angle little by little and tuft in single bursts.
FAQ
What kind of yarn should I use?
As long as it isn't extremely thick or thin, you can use almost any yarn.
Can I wash the rug I made?
It's best not to wash the whole rug. We recommend vacuuming it gently and wiping only the dirty spots with a little diluted mild detergent.